Real talk: There’s no quick way to become more flexible. That’s not to say you should cross it off your list of fitness goals, though, it just means you’ll have to work harder to get there. A great place to start is with yoga. And one move that definitely needs to be added to your practice is pigeon pose.
This of my favourite of all hip openers, which are asanas that can help loosen up tight joints and release any emotional tension stuck there. As such, pigeon pose (a.k.a. Kapotasana) is deeply healing, yet super challenging. It requires you to engage both mentally and physically. When you start to feel a push back from your body, that’s when you really need to lean into it and trust that you’ve got this!
If this sounds a little scary to you, don’t worry. Below, I’ll break down the pose step by step. It’s actually accessible at all levels — and there are modifications you can make to meet wherever you are on your fitness journey. For example, beginners will want to use blocks and blankets (or towels and pillows) to prop up under the hips and support deeper opening. Remember: This move it meant to be powerful, but passive. You don’t need force to engage it. Here’s everything you need to know about pigeon pose including how to, benefits, form tips, modifications, and more.
Benefits Of Pigeon Pose
Like I said, this move is both a physical and emotional release. Our hips get tight from sitting, driving, and even from too much exercise. But they can also tense up when holding onto your emotions and not letting them pass.
READ MORE: 9 Best Yoga Apps To Level-Up Your At-Home Practice
It’s not in our natural cadence of life to stretch our hips, so we really need to take the time to do it. A daily pigeon pose soothes our holistic health and can work your body up to the level of flexibility that you really want.
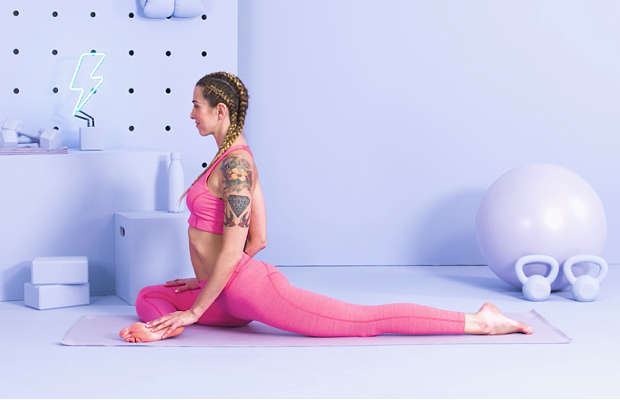
How To Do Pigeon Pose
- Start in a low lunge with right leg forward and bent and 90 degrees and left leg back.
- Shimmy right foot behind left hand and lower down to the floor so shin in parallel to top of mat
- Scoot your left leg back a bit, if need be, for extra room and unflex foot and make sure left toes, heel, ankle, knee, and hip are all in the same line.
- Square torso toward front of room and keep shoulders over hips while you breathe for one minute.
- Repeat on the left side.
Pro tip: Come out of the pose slowly, even if it feels a little uncomfortable. The release is worth it. And you’ll feel amazing afterward.
Modifications Of Pigeon Pose
Prop yourself up: If you’re struggling to hold the stretch because your hips are tight, add a block or blanket under the glute on your bent leg to give them some additional support.
READ MORE: 10 Yoga Stretches That’ll Ease Lower Back Pain And Open Up Tight Hips
Fold forward: Feel comfortable sitting upright? Go ahead and lower your torso over your front thigh for a deeper stretch. Then, walk your ams out to lie straight on the floor in front of you and place your head on the ground or a block.
How To Avoid Injury During Pigeon Pose
Pigeon pose can be a little tricky given that most people have tight hips to begin with, so make sure you take it slow. Don’t come into or out of it too fast. Try to hold the stretch on each side for at least 30 seconds (that’s how long it takes your brain to signal to your muscles that it’s a-ok to relax). Above all else, remember to breathe!
How To Work Pigeon Pose Into Your Routine
Do it in the morning: Starting your day off with pigeon pose is a great way to release any tension left over from being asleep. How cool would it be to start your day open as opposed to letting stress build?
Use it to close out your day: It’s also a great move to do before bed. Pigeon pose feels incredibly relaxing (once you come out of it!), so squeezing it in before you go to sleep in order to calm and soften your mind and muscles.
.